Welcome to my Spreadsheet for Budgeting Monthly!
I’ve been using this spreadsheet for the last 2 years ever since I got my first job. It’s really helped me control my spending and see where my money is going.
So today I want to provide you guys with this spreadsheet absolutely for free, really I’m not even going to collect emails or anything.
Just click on this link and it will take you to the spreadsheet. Then, make a copy of it so that you can edit it and then we can begin.
So now that you have the spreadsheet I want to explain how it works, how you can use it, and everything else you need to know about this spreadsheet for budgeting monthly!
Spreadsheet Organization
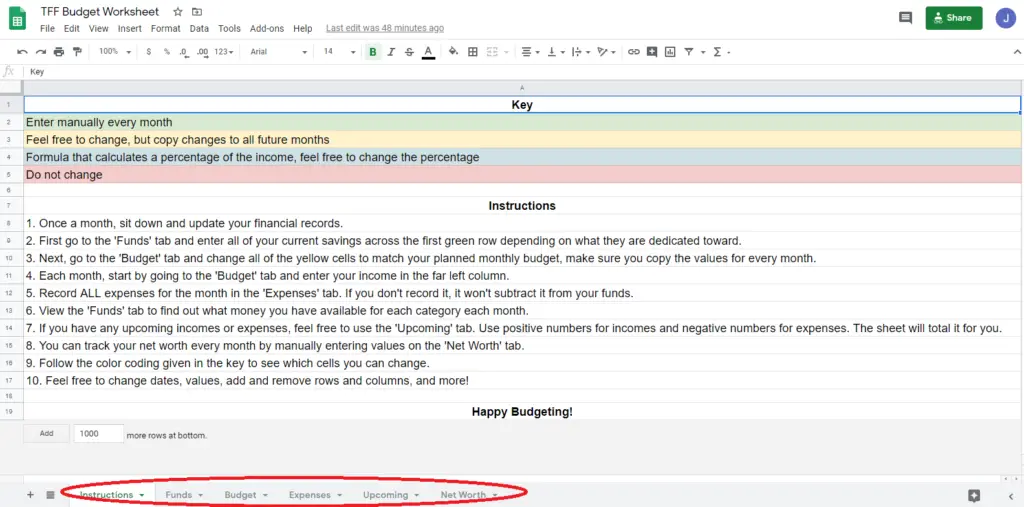
When you first open the spreadsheet, you’ll be on the instructions tab. There are several other tabs that you’ll need to access in order to make this spreadsheet work. Here’s how they all work:
Instructions: It’s pretty self-explanatory, this is the tab where you can see how to work the spreadsheet and see the key for the color coding that the spreadsheet uses. Read through this tab before you begin!
Funds: This tab is where you’ll see how much money you have saved for each category. Basically, the funds that you have available to spend for each category. There’s not much work you have to here, the spreadsheet will update for you automatically.
Budget: The budget tab is where you enter your budget. This is how much money you hope to spend each month for each category. This is the ideal scenario, where you hope to spend your money.
Expenses: This tab is where you record what you actuallly spent. You need to keep track of everything that you spend each month and enter it here. If you don’t enter your expenses the spreadsheet won’t work properly.
Upcoming: Here you can list any upcoming incomes and expenses so that you can plan for the future. The bottom will total it all up for you so that you can get a rough idea to see if you’ll owe money or have extra money.
Net Worth: This is where you can track your net worth by listing out all of your assets and liabilities. It’s good to track your net worth so that you can see if you’re making progress month to month or if you’re not.
Spreadsheet Instructions
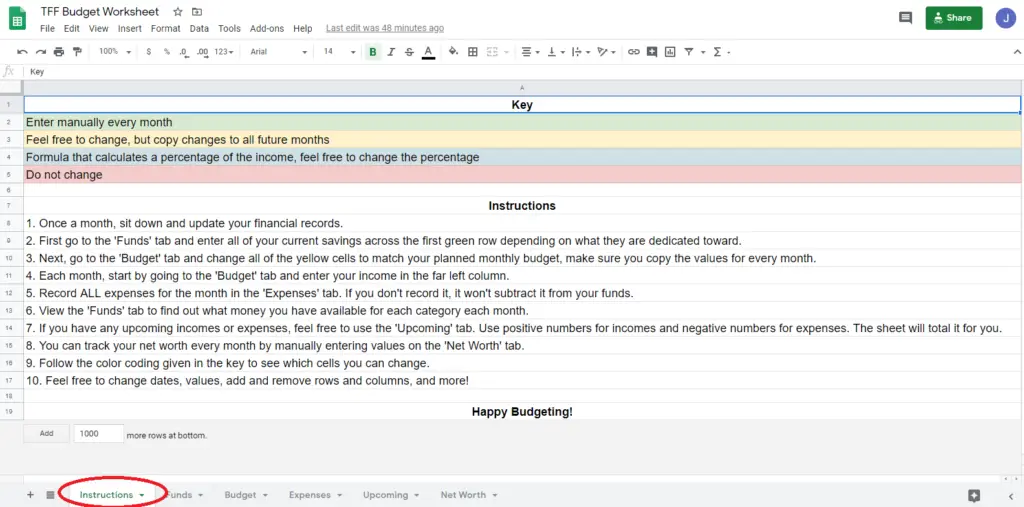
So now I want to go over the instructions tab so that you can better understand what the instructions mean.
Color Coding
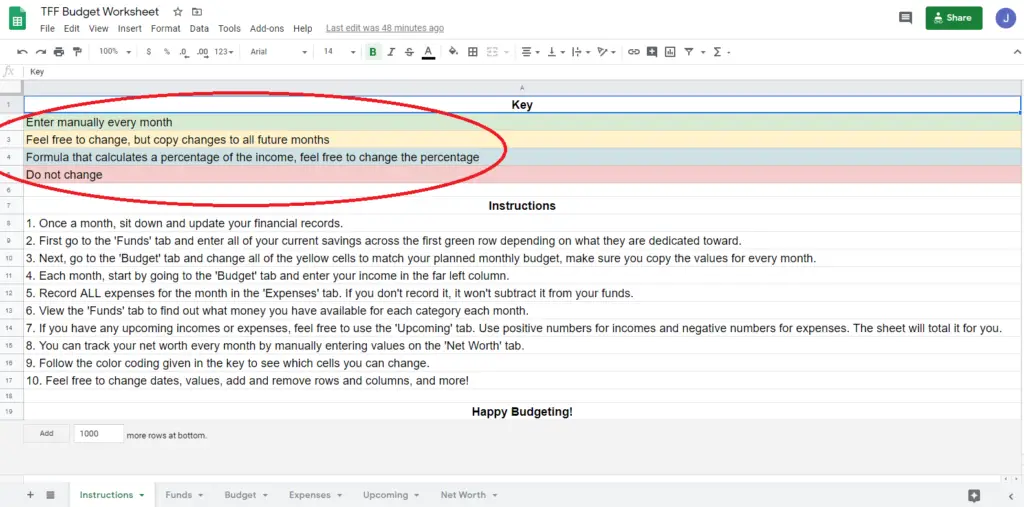
The first thing that you will notice is the key, and here’s what each color means:
Green: These cells are where you have to manually enter in values every month. The spreadsheet won’t do this for you. You have to do some math and figure out what values need to go in these cells and then enter them in. Feel free to leave these cells blank if you didn’t spend or earn anything from these categories.
Yellow: These cells are found in the budget tab, and you can edit them. However, when you change the values in these cells, make sure you copy the changes to all the future months as well so that you budget stays the same each month. If you don’t know how to copy on Google Sheets, simply click on the box in the bottom right corner of the cell and drag that down however far you want to copy that value.
Blue: These cells are also found on the budget tab and are formulas. When you are editing these, make sure that you are editing the formula, not just the number in the cell. Basically, these cells take a percentage of your earned income and distribute it to that category. For example, the savings column will make you save 10% of your income automatically. You’re welcome to change these, just make sure that you’re changing the percentage, and copying to all the future months as well.
Red: These cells should not be edited! The spreadsheet will automatically change the values in these cells so you shouldn’t touch them. If you do, then you might mess up the formula and then the spreadsheet won’t work properly.
Instructions
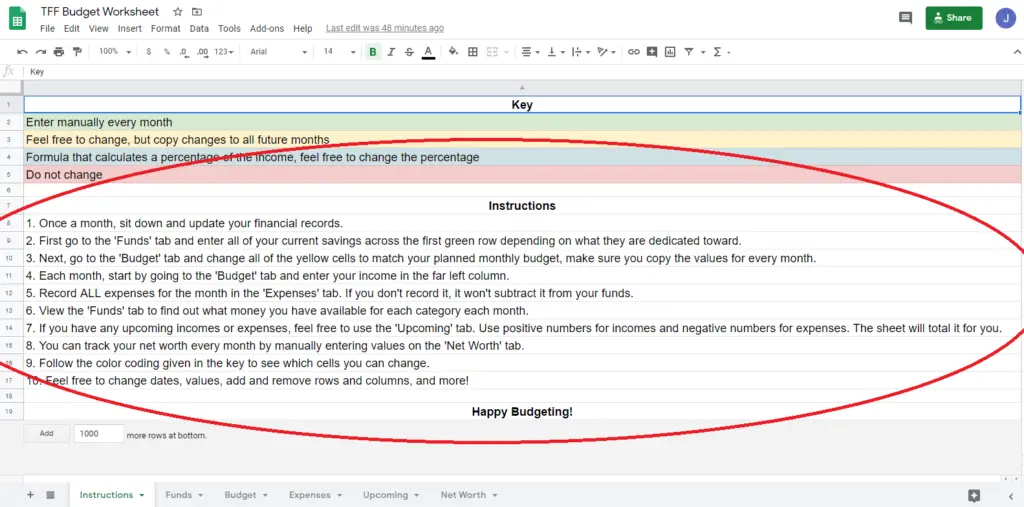
Now that we’ve gone through the color coding, I want to further explain the instructions just so that everyone understands.
- Once a month, sit down and update your financial records. I highly recommend that you update your financial records once a month. It’s a good practice to sit down, pay your bills, balance the books, update your budget, and update your net worth. So I would hop on this spreadsheet once a month and enter in all of the necessary data.
- First go to the ‘Funds’ tab and enter all of your current savings across the first green row depending on what they are dedicated toward. If you go to the funds tab, you’ll see the green cells across the top cells. You will have to manually enter the amount of money you currently have saved for each category. You only have to do this for the first month, after that, the spreadsheet will do it for you.
- Next, go to the ‘Budget’ tab and change all of the yellow cells to match your planned monthly budget, make sure you copy the values for every month. This is where you have to enter your monthly budget that you hope to spend and copy that budget to every month in the spreadsheet.
- Each month, start by going to the ‘Budget’ tab and enter your income in the far left column. You’ll need to calculate your total earned income and then enter the value here. The spreadsheet will then calculate a lot of numbers off of this value.
- Record ALL expenses for the month in the ‘Expenses’ tab. If you don’t record it, it won’t subtract it from your funds. This means that you need to track EVERY expense that you have each month. I’d recommend that you get an app that allows you to enter in your expenses. It’s imperative that every expenses is entered, otherwise you’ll think that you have more money than you actually do.
- View the ‘Funds’ tab to find out what money you have available for each category each month. At this point, the spreadsheet will take your income and your expenses and add funds to each category that you can see on the funds tab. This is how much you can spend for each category.
- If you have any upcoming incomes or expenses, feel free to use the ‘Upcoming’ tab. Use positive numbers for incomes and negative numbers for expenses. The sheet will total it for you.
- You can track your net worth every month by manually entering values on the ‘Net Worth’ tab. Each month enter it how much you have or how much something is worth to find out what your net worth. Ideally, your net worth will grow larger each month.
- Follow the color coding given in the key to see which cells you can change.
- Feel free to change dates, values, add and remove rows and columns, and more!
How The Spreadsheet Works
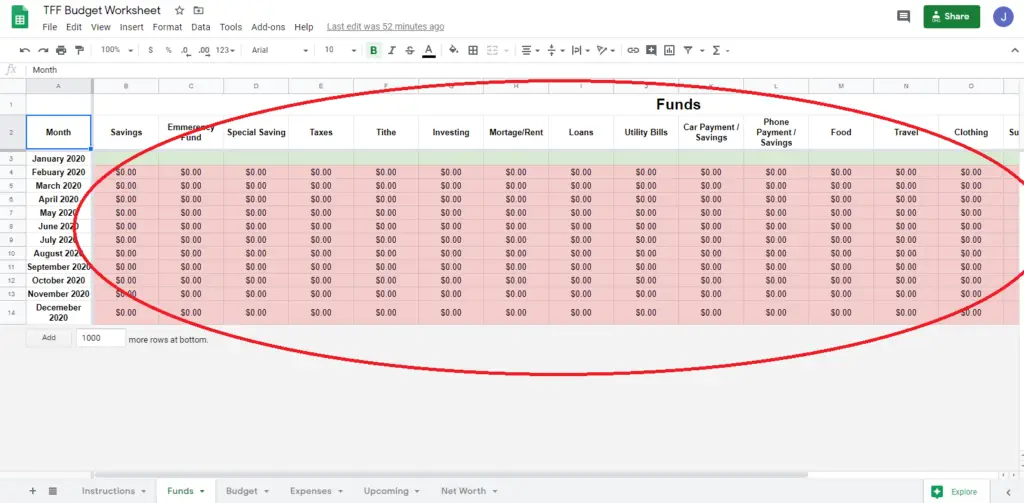
Now that you know the color coding and the instructions, you shod get an idea of how the spreadsheet works so that you understand and can make any changes that you need to.
First and foremost, the budget tab will take your income and divide it across all of the categories. If there is money leftover, it shows up in the far right surplus savings column. Hopefully you have a positive number as your surplus, this means that your income was higher than your expenses. If this is the case, than the surplus is added to your savings. If you income is less than your expenses, a negative number will show up and that money will be subtracted from your savings.
Then you’ll go and enter your expenses on the expenses tab and the spreadsheet will use those numbers in the next step.
Finally, on the funds tab, the spreadsheet will take the value from the previous month, add the income for that category from the budget tab, subtract the expenses from that category from the expenses tab, and then display the funds available. This is how much you have spend.
The whole spreadsheet is actually pretty simple when you think about it this way:
Funds = Income (Budget) – Expenses
Editing the Spreadsheet
Categories
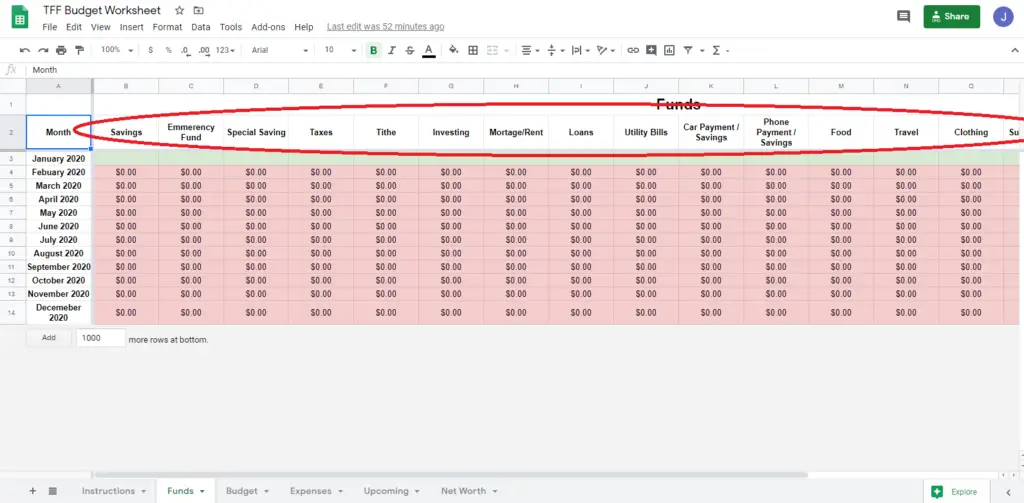
I tried to list some common categories that everyone might have when budgeting. These include:
- Savings
- Emergency Fund
- Special Savings
- Taxes
- Tithe
- Investing
- Mortgage/Rent
- Loans
- Utility Bills
- Car Payment/Savings
- Phone Payment/Savings
- Food
- Travel
- Clothing
- Subscriptions
- Gas
- Gifts
- Spend
Obviously this probably won’t exactly match the categories that you need.
For example, I need a taxes category because I am self employed and my taxes aren’t automatically deducted from my paycheck like most people. Therefore, I have to save money throughout the year in order to pay my taxes.
So if some of these categories aren’t for you, feel free to delete them. Just right click on column and hit delete column. But if you do delete it, make sure you go to each tab and delete that column from every tab.
You can also change the category names or change the values for that category.
Ultimatly, this spreadsheet is for you, so make it work for you!
Months
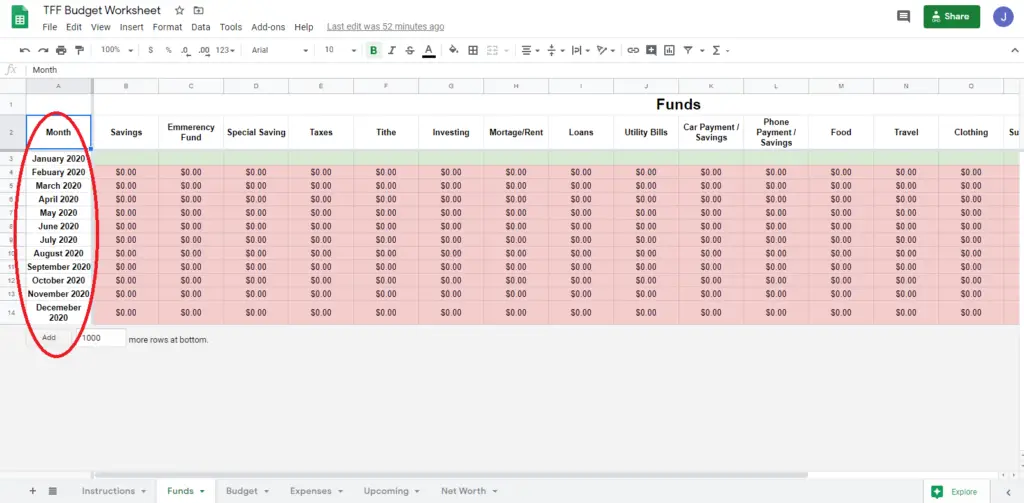
The months on the left hand side will most likely not match the current month that you’re using this spreadsheet in.
Feel free to change these months to make it match your situation. If you use all 12 of the months, simply add more rows below the last month and then copy the formulas to the new rows.
Balancing the Spreadsheet
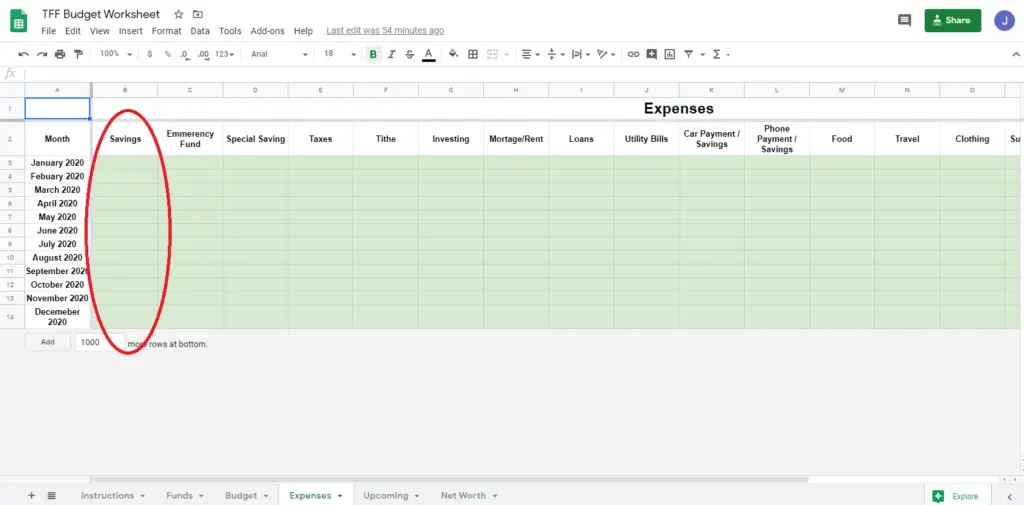
Unfortunately, this spreadsheet will not record your finances perfectly. There will be mistakes that either you or the spreadsheet makes. Therefore, I won’t rely on it completely. In order to check the spreadsheet’s accuracy, each month I balance it with what I have.
Here’s how that works for me:
I tally up all of the liquidated money I have (cash, coins, bank accounts, etc.). This is what I base my spreadsheet on. I don’t include my car, investments, or college savings because those aren’t liquid currently.
Now that I know how much money I actually have, it’s time to figure out how much money the spreadsheet says I have. To do this, I add up all of categories in the funds tab for the month that I’m in. Hopefully, that number is close to what I actually have. If it’s not, then I need to modify the spreadsheet.
I choose to add/subtract money from savings in order to balance my spreadsheet. In order to do that, here’s what you need to do:
If you have extra money that the spreadsheet doesn’t show, than put the surplus in the savings expenses as a NEGATIVE (-surplus). I know it’s counter intuitive, but in this case, there are two negatives that cancel each other out in this spreadsheet.
If you have less money than the spreadsheet shows, than put than put the surplus in the savings expenses as a POSITIVE (surplus). This will actually subtract the extra amount from your savings funds and make the spreadsheet match the cash you have.
I highly recommend that you do that each month to make sure that your spreadsheet is as accurate as it can be.
The other thing you might need to balance is when you spend more in a category than your saved up for that category. For example, your funds tab showed $100 saved for food, but, you actually spent $200 on food, so know your funds will show -$100 for food.
In this situation, you have two options.
- Let the negative be, and in this case your next month’s income will slowly replenish the negative. I don’t recommend this though, because if it’s something like food, that means you can’t eat that month.
- The other option is to take some out of savings to cover the surplus. So if there was a -$100 shown, you would add $100 to the savings expenses, and subtract $100 from the food expenses. This would take money out of your savings and add it to the food funds to make the balance $0 instead of -$100.
All you need to know in order to balance this spreadsheet is that you can change the savings expenses to either add more money to a certain category and subtract money from a certain category to match what you actually have.
The Takeaway
If you made it this far, wow, I’m impressed. I’m well aware that a lot of that was just me being a nerd and no one else probably understood it. I hope that you at least understand something and I hope that this spreadsheet will help you with your budgeting. Make sure you click this link to try the spreadsheet our for yourself! That’s it! I hope you enjoy this spreadsheet for budgeting monthly!
For more budgeting organization, be sure to order the Clever Fox Budget Planner & Monthly Bill Organizer with Pockets. Expense Tracker Notebook, Budgeting Journal and Financial Planner Budget Book to Control Your Money.
